Part of the challenge in Foldit is hand-folding, which consists of manually dragging parts of the protein to new locations. Foldit also offers a number of tools which attempt to automatically improve various aspects of a given fold. These tools can be invoked manually from the Foldit GUI interface, or programmatically from a Foldit recipe. This article describes the main Foldit tools and the considerations for using them.
The exact details of how these tools work are hard to come by. Some of the tools may correspond closely to functions of the Rosetta software that underlies Foldit. The goal of this article is to describe the tools at a high level, without digging down to the level of the Rosetta algorithms. As a result, descriptions may say that a tool "seems to" or "appears to" work in a particular way.
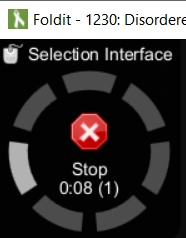
All of the tools can either operate on the entire protein or only on selected segments of the protein. When using the tools manually, it may be desirable to switch to the Foldit selection interface, which, as the name implies, allows individual segments and groups of segments to be selected. Segments can also be selected programmatically through recipes written using the Foldit Lua interface, version 2. The keyboard shortcuts referenced in this article are the ones found in the selection interface in a Windows client using the English language.
Shake[]
The shake tools, also known as "shake sidechains" moves the sidechains of one or more segments, attempting to find a best
"Cycle counter" displayed in the Advanced GUI.
position. The shake tool can either shake all sidechains in the protein, or the only the sidechains of selected segments.
"Shake", along with "wiggle" are the two most basic tools in Foldit, and can be applied in a wide range of situations.
As the name implies, "shake" is more dramatic than "wiggle", but shake does not generally change the overall shape of the protein. "Wiggle", on the other hand, can cause an unstable protein to fly apart.
In general, "shake" does all its work in the first cycle. When running the tool manually, the number of cycles can be seen in the upper left of the Foldit window if the "Show advanced GUI" option is checked under "General Options" on the "Menu" menu. In a recipe, the number of cycles is controlled by a parameter passed to one of the shake functions.
The shake tool is available via the lowercase "S" shortcut in the GUI, or via the scripting functions structure.ShakeSidechainsAll or structure.ShakeSidechainsSelected.
Wiggle[]
The "wiggle" tool wiggles either the sidechains or the backbone of the protein, or both.
Wiggling sidechains can be selected manually by the lowercase "E" shortcut in the GUI. Wiggling sidechains is like a less dramatic version of "shake", and doesn't generally change the overall shape of the protein.
Wiggling backbone can be selected by the lowercase "T" shortcut in the GUI. Wiggling the backbone does tend to change the overall shape of the protein.
The most common version of wiggle wiggles the backbone and the sidechains at the same time. This "wiggle all" option is available via the lowercase "W" shortcut in the GUI.
Unlike "shake", "wiggle" may require many cycles to reach its best position. In the GUI, the clock icon in the upper left will start to spin rapidly when "wiggle" has exhausted itself.
The scripting commands for wiggle are structure.WiggleSidechainsAll and structure.WiggleSidechainsSelected. Both functions take an integer number of iterations, and two boolean arguments, indicating whether to wiggle backbone and sidechains.
Rebuild[]
The "rebuild" tool searches a database of protein shapes to find a new backbone position for a number of segments. The rebuild tool seems to start at a different random point in the database each time. The secondary structure of the segments in question seems to influence the resulting rebuild position. For example, in a denovo puzzle, rebuilding a section marked as a helix is more likely to find a helical shape than rebuilding a section marked as loop.
The rebuild tool can be selected manually by the lowercase "O" shortcut in the GUI. Using rebuild in the GUI generally involves watching to the protein, and stopping when it reaches the desired shape. The Undo command (lowercase "Z" or ctrl+z) can backtrack through various rebuild positions. The equivalent scripting command to rebulild is structure.RebuildSelected.
A rebuild alone is seldom enough to improve the protein. Further work with wiggle and shake is also necessary to refine the solution. This also applies to the Mutate, Idealize, and Remix tools, along with changes made via the Rama map.
Mutate[]
The "mutate" tool is available on design puzzles. There are two ways to mutate. The first option is to pick a specific amino acid for a specific segment of segments. This option is available via the lowercase "M" shortcut in the GUI or the equivalent scripting functions (structure.SetAminoAcid or structure.SetAminoAcidSelected).
The second mutate option involves letting Foldit pick the best amino acids for a segment or segments. This option is available via the lowercase "Y" shortcut in the GUI and the equivalent scripting functions (structure.MutateSidechainsAll or structure.MutateSidechainsSelected). As with many tools, the details of how Foldit picks the "best" amino acid are not known.
Idealize[]
Some Foldit tools can leave the backbone of the protein in a shape that is not normally found in nature. The "Idealize" tool attempts to correct this type of problem.
In the GUI, there are two "idealize" options. The first is available via the "5" shortcut, and is described as "idealize the secondary structure". This tool works for one or more selected segments. There does not seem to be a scripting equivalent for this GUI function.

"Show backbone issues" highlights problem between segments 4 and 5.
The other GUI "idealize" option is available via the "2" shortcut, and is described as "idealize peptide bonds". This option is only available when two or more segments are selected. It seems to produce the same results as the scripting function structure.IdealizeSelected, at least in limited tests.
Ideality problems can be found in various ways. If the "Show advanced GUI" option is selected, a "View" option called "Show backbone issues" is available. This option causes an exclamation point icon to be displayed, pointing to bad peptide bonds. Clicking on this icon will fix the bad bond, which seems similar to selecting the two segments adjacent to the exclamation point icon and using the "2" shortcut to "idealize peptide bonds".
Another way to see ideality problems is to look at segment subscores. To see a segment's subscores, hover over the segment and hit the tab key. The composite image above shows the subscores for segments 4 and 5, both with large negative Ideality scores.
Remix[]
The "Remix" tool is an alternate method for improving the backbone shape of selected segments. The "Remix" tool is available for three or more selected segments. In the GUI, the "4" shortcut invokes Remix, or the scripting function structure.RemixSelected is available.
As of May, 2016, the Remix tool has several new features. When invoked through the GUI, Remix displays one or more possible replacements for the selected segments. The user can click on arrow icons to see the score associated with each replacement. The user can save promising replacements to quicksave slots 1 through 8. The quicksaved replacements can be processed further after stopping the remix tool.
The function structure.RemixSelected has been extended in a similar way. The function now takes two arguments: the first quicksave slot number, and the maximum number of replacements to return. The function now returns the number of replacements found. The recipe can then perform further processing on the corresponding quicksave slots.
Rama Map[]
The "Rama Map" is yet another Foldit tool. The Rama Map (or "Ramachandran Map") is available via the "Rama Map" icon on the "Menu" menu. Each segment in the protein is represented as a dot on the Rama map.
Unlike any other Foldit tools, the Rama Map shows the critical "dihedral angles" known as phi and psi. (The phi angle is the horizontal axis, and the psi angle is the vertical axis of the Rama Map.)

The Rama Shows segment 4 is an outlier.
Clicking on a dot in the Rama Map selects a segment, and changes the black dot to a square with black border. (A segment or segments can also be selected as usual via the selection interface, becoming squares on the Rama Map.)
Simply dragging one of the Rama Map squares to a new location will change its phi and psi angles.
The Rama Map is available only via the GUI. There is no corresponding script function to interrogate or set the phi and psi angles.